How can I disassemble my EXIT swimming pool dome?
What is the best way to disassemble the EXIT swimming pool dome? Read all about the EXIT Toys plan divided into handy steps!
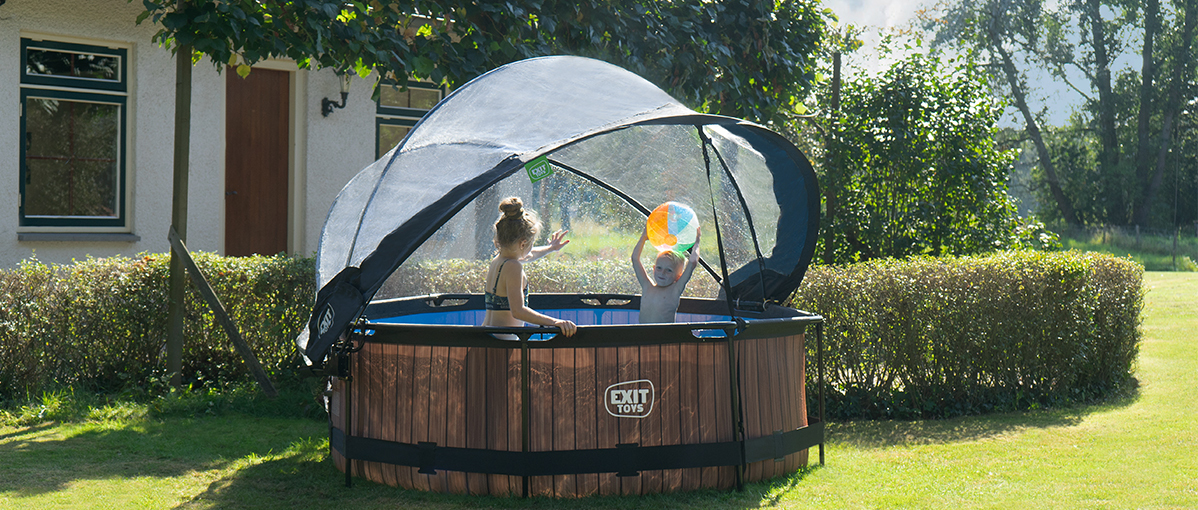
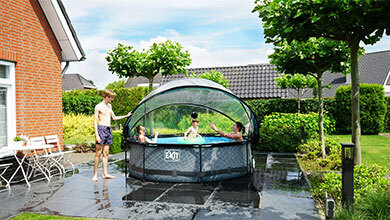
With an EXIT swimming pool dome or canopy you get even more fun out of your swimming pool. When the sun’s out bright, the canopy offers protection against UV radiation. With a dome you can have fun in your very own indoor swimming pool even when the weather isn’t that great. EXIT Toys has some convenient tips for setting up such a dome, so you can get the job done fast and start your swimming adventure!
Before you start it’s good to check whether you have all the parts. You can easily do this by means of the manual. Is there a part missing? Then first contact our customer service.
Below are a few more tips before the real work starts:
✔ Set up the swimming pool dome with two persons: an extra pair of hands will come in handy.
✔ Place the bases for the straps underneath the legs of the swimming pool before the swimming pool is filled with water. Namely after filling the pool it’s very difficult to lift one of the legs. Place the bases at the front as well as at the back of the swimming pool!
✔ While you continue setting up the dome you can start (partially)filling the swimming pool. With about 10 percent of swimming pool water, the frame gets more stable, and the dome will be easier to attach.
✔ Did you choose a dome and a canopy? Then first attach the impeller hinges of both products to each other. That way they’ll be much easier to work with.
Have you arranged the tips we mentioned above? Good, now it’s time for some serious work.
Note: do you have a swimming pool dome or canopy sized 400 x 200 or 540 x 250 cm? Then further in this blog we offer you some useful tips for setting up domes with these dimensions.
✔ Attach the impeller hinges to the frame of the swimming pool in the correct way (see manual).
→ The side with the fixed tube is the back of the hinge; this side cannot be opened. So think in advance at which side of the swimming pool you want the dome to open.
✔ Connect the tubes to each other.
→ With the round domes you can easily click the tubes together.
→ The tubes for the rectangular domes have different lengths. Make sure you attach them in the right order.
→ In addition, with the rectangular domes it’s better to attach the last tube with a corner to the other side once the other tubes have already been passed through the tarpaulin or the canvas.
✔ Lay the tarpaulin or canvas on the ground, for example on the grass or terrace and pass the tubes through the tarpaulin or the canvas. It is more convenient to do this together with someone else.
→ Push the tubes through the material instead of pulling them through. That way you’ll prevent the tubes from getting stuck in the tarpaulin.
→ The tubes should be on the inside of the dome. If rain remains on the material, the dome will not sag as quickly, and the material will be less likely to tear.
→ The round domes with a diameter of 427, 450 and 488 cm have a thicker tube, which you can use to open and close the dome. This should be placed at the front. You will find a larger connection for this in the impeller hinge.
✔ Now lift the tarpaulin or canvas onto the frame of the swimming pool and click the tubes in the tubes of the impeller hinge on both sides of the swimming pool. It’s best to do this with two persons, especially when you have a larger size pool.
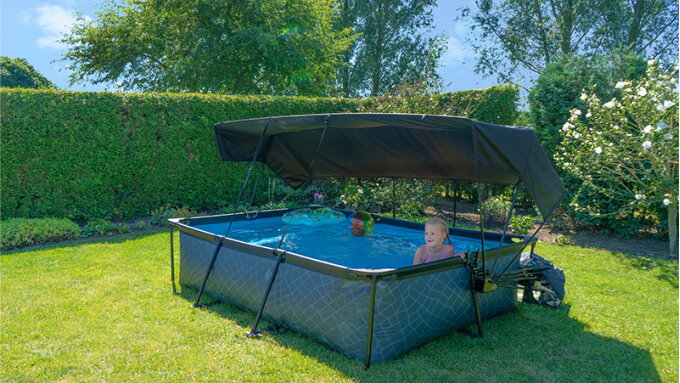
The domes with swimming pools sized 400 x 200 and 540 x 250 cm have a different impeller hinge, namely one with a pneumatic spring. Due to this, the dome can stay half open, without having to attach it to the frame with straps.
When you’re not using the pool, you can firmly attach the closed dome to the pool with the added elastic bands. That way you also make sure no dirt can end up in the swimming pool.
Good to know: these domes are only suitable for the rectangular frame swimming poles sized 400 x 200 and 540 x 250 cm of EXIT Toys!
Tips to take into account:
✔ The manual states that you must attach the pneumatic spring to a tube of the impeller hinge by means of a screw. This screw is already inside the tube so you will not find it in the bag with the added separate screws.
✔ Attach the impeller hinges to the swimming pool frame in the correct way (see manual). You can see how the dome opens on the sticker on the inside of the hinge.
✔ Attach the tubes to each other and pass them through the tarpaulin or canvas (see Step 2).
Now lay the tarpaulin or canvas on the swimming pool and click the tubes in the hinges. Especially with domes of these dimensions we recommend doing this together with someone else. That will make this job much easier.
✔ That’s it, the work is done! Namely you can skip Step 3: these tips are meant for all other EXIT domes. You can now go and enjoy your EXIT swimming pool with dome and/or canopy!
The end is near. All that’s left now is dotting the i’s and crossing the t’s and then you can go and enjoy the benefits of your EXIT dome or canopy.
✔ Attach the straps of the dome or the canopy to the frame of the swimming pool.
→ When you are not using the swimming pool, you can attach the dome to the pool with these straps. That way you also prevent dirt from ending up in the water and of course you will benefit from a natural heating of the water.
→ When the dome is open, then neatly fold the tarpaulin or canvas and secure it to the back of the pool with the straps. Make sure the material is dry, to prevent mould from forming on in.
Now your swimming pool with dome and/or canopy is completely ready for summer. Are you having a less summery day or are you looking for a refreshing spot away from the bright sun and in the shade? With an EXIT dome or canopy you will get maximum fun out of the swimming season!
Do you have any questions about setting up an EXIT dome or canopy? Or could you use some extra help? Let us know, our customer service is here for you! Feel free to contact us through the chat, call +31 314 - 796 020 or send an email to info@exittoys.com. We are happy to help so you can quickly enjoy your swimming adventure!

What is the best way to disassemble the EXIT swimming pool dome? Read all about the EXIT Toys plan divided into handy steps!
Effortlessly setting up your swimming pool? EXIT Toys has ligned up the most important steps for you so you can quicly enjoy lots of swimming fun!
Do you also want a cool pool dome or canopy from EXIT Toys on your frame swimming pool? Read in this blog if a unique EXIT dome fits your frame pool.
Our website uses cookies. We use functional, analytical, and tracking cookies to analyze traffic on our website and personalize content. This allows us to improve the user experience on the website.
By clicking 'Customize', you can learn more about the specific types of cookies and customize your preferences. By clicking 'Allow all cookies', you agree to the use of all cookies. You can find more information in our cookie policy.